Wednesday 29 February 2012

Pancit

This is a Filipino Noodle dish called Pancit, it is quite easy to make.

Pancit Noodle

Ingredients:
Green Beans
Mushroom, cut into slices
Chicken Breast
Garlic
Leek or Welsh Onion
Lettuce, sliced into strips
Carrot, sliced into strips
White Onion
3 packs of Egg Noodles
Prawns, keep the skin
 

Steps:
Fry the Onions and Garlic in oil. When they turn into a golden brown color add the Chicken Breast and the shrimp and continue to fry them until they are almost cooked.


Add the mushrooms, the leek, the lettuce and the carrots into the pan. Fry them together and make sure that nothing is overcooked. Add some soy sauce if it lacks flavor.


When the Ingredients are cooked remove them from the pan and place it on a plate. Take a pot and boil water, when it starts to bubble add the excess skin of the prawn. Boil it for 10 minutes or until the water has an orange tint.
After that is done drain the stock and put it in the frying pan. Add some soy sauce and oyster sauce until you get a dark mixture. Add the Egg noodles that you are going to use for the Pancit into the frying pan. Make sure that it softens and blends well with the sauce.

Stir Fry the Noodles and add back the ingredients to the frying pan. Fry the noodles until all the ingredients are hot and then plate it.

Voila you got some traditional Filipino Cuisine that tastes really good. 


Saturday 25 February 2012

Omuraisu

Omurice

This is a really simple dish that tastes good, it is one of my sister's favorites. It is omurice or omelette rice, it is a more recent japanese dish, some restaurants serve it.

Ingredients:
3 eggs
One leaf of Japanese cabbage
2 slabs of bacon
3 cloves of garlic
200g minced beef
about 1/5 of a white onion
some rice
black pepper
ketchup
5 white button mushrooms
butter
olive oil
3 sprigs spring onions
3 leaves of basil


Steps:
Prepare the ingredients. Slice the bacon into strips. Cut the Japanese cabbage into thin strips. Peel and chop 1/5 of the white onion lengthwise. Cut the white button mushroom into slices. Prepare the minced beef and slice the garlic. also cut up the spring onions for later.
Cook the filling ingredients. Fry some olive oil in the pan, fry the garlic till it is golden brown and is very fragrant. Sauté the mushrooms in the garlic and add some black pepper, when it is cooked add the minced beef into the mushrooms. Then add the sliced bacon and fry till all of the ingredients are cooked. Then remove the ingredients and put them on a plate


Fry some butter in the pan and then add the white onion and fry till it becomes mostly soft. Put in the rice to the pan and mix well, the color of the rice should be nice.


 Add some ketchup to the rice and mix, this will give it a good orange color. Add back all the ingredients and mix it well with the rice. When it is completely cooked add some spring onions on the top.
Take another frying pan and fry some butter. Crack the three eggs into the frying pan, mix it in the pan while the egg white is cooking. Cover the centre of the egg in a single column with the rice. then flip the egg over the rice and then flip it to a plate.


Top the omurice with ketchup and japanese mayonnaise and put three leafs of basil. There you got omurice, this is a really good dish. I say literally it will taste good. try it if you like egg or rice.


Wednesday 22 February 2012

Salted Egg Ebi and Kabocha Tempura.

This is basically using the same method to make tempura, but with some extra steps. The reason that I used Japanese Pumpkin in addition to the prawn is because Kabocha Tempura is really tasty.

Salted Egg Prawn and Japanese Pumpkin

Ingredients:
half a Kabocha (or Japanese Pumpkin)
7 White Prawns
4 Salted Eggs
1 Sprigs Spring Onion
Oil
Butter
Tempura Flour
Water
2 Eggs
 Steps:
First wash the sand off of the salted egg, then put it in a pot of boiling water and boil for five minutes. After five minutes remove the eggs and put them into a bowl. Open the Salted eggs with your hands and put all the hardened yolk into one bowl. Take a fork and mash up the Salted Yolks.


Peel the White Prawns. Remove the Pulp and the seeds from the Japanese Pumpkin. Cut the skin off of the Pumpkin and slice it into pieces. Get a bowl and mix Some Tempura Flour with water and an egg.


Get two pans ready. In One of the Pans fry some butter and then add the Mashed Salted into the Pan. The Egg will be a bit solidified, so add some olive oil into the Egg Mixture. In the Second Pan fry a lot of oil. Cover your prawn and pumpkin with the Batter before frying in the oil. When they are cooked remove from the pan and put it into the Egg Mixture, making sure that the Salted Egg sticks to the Pumpkin and Prawn.
After you finish frying them in the oil and then the Salted Egg Plate it and Garnish with Spring Onions.
Voila, Salted Egg Ebi and Kabochi 

Monday 20 February 2012

Kurobata Ramen (Takes Some Time)


This is ramen that is really hard to make. It takes a lot of time and effort, but is a really good and filling food. It is a traditional recipe and is good if you are making food for someone who is sick. Due to its complexity, I will split it into three parts. These will join together in the end.

1st- Toppings~Marinated Softboiled Egg
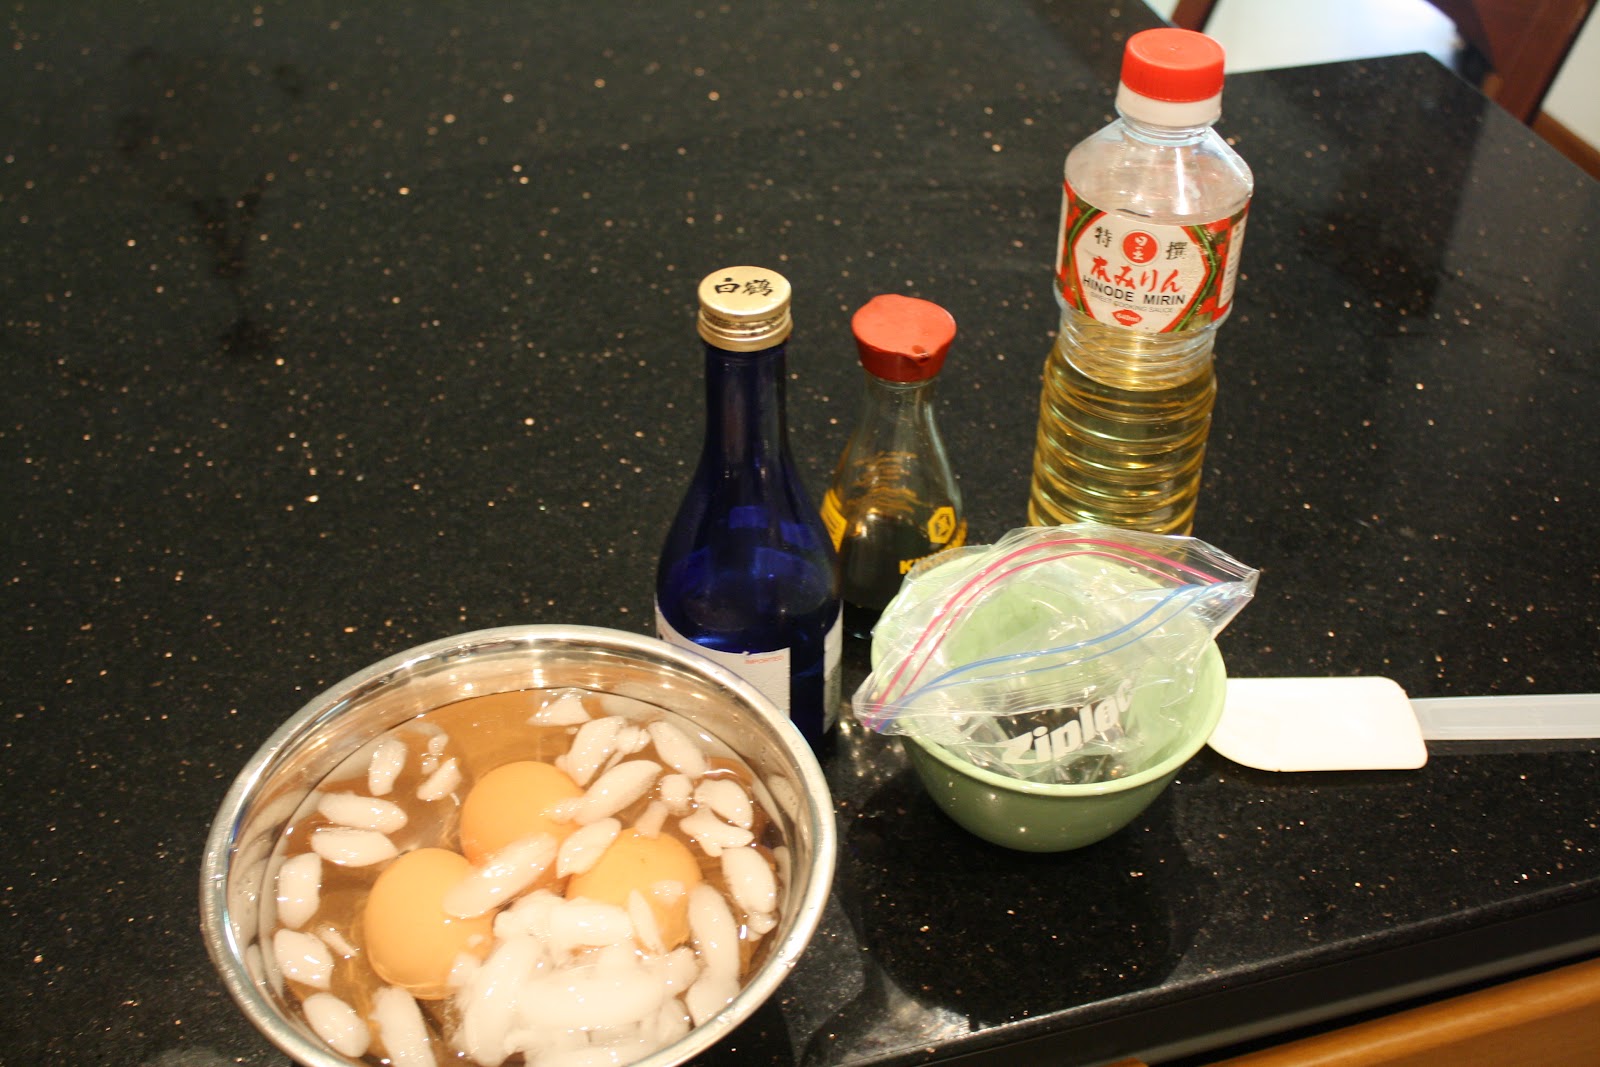
Ingredients:
Sake
Soy sauce
Mirin
Ice
Water
3 Eggs

Steps: First boil some water in a pot, add the eggs into the pot. Time it for exactly 5 minutes after the water starts boiling. Remove the Eggs and put them into a bowl of iced water. Peel the soft boiled eggs. Take a ziplock bag and put soy sauce, sake and mirin. put the eggs into the ziplock bag and put it in the refrigerator. Leave it for one day. After one day cut them into half slices.


Toppings~Konegi
Take some spring onions and cut into thin strips lengthwise.

Toppings~Noodles
Take some Ramen Noodles Boil in a pot and then filter and mix with sesame oil.
Toppings~Black Fungus
Take some Black fungus and boil in a pot of hot water
Toppings~Naruto Maki
Take some pieces of Naruto Maki and cut into thin slices. 

All the toppings must be prepared by the time all the stocks are finished.


2nd -Pork Belly and Pork stock

Ingredients:
2 slabs of Pork Belly
Welsh Onion or Leek cut only the leaves
Ginger, Crushed
Butter
Water


Steps: 
Fry some butter in a large pot, when it is melted add in the pork belly. Fry the entire Pork belly and leave it cooking on low heat for at least two hours. After two hours, add the water to the pork belly. Put in the crushed Ginger and Welsh Onion Leaves into the water. 
Put a glass weight on top of the stock and remove the excess fat from the top of the stock. Boil it for thirty minutes.
Drain the stock and throw away the welsh onion and crushed ginger. Keep the stock in a separate bowl. Remove the pork and put it on the chopping board. Start to chop the pork belly into slices.
Take the chopped Pork belly slices and arrange onto a nonstick pan and grill in the toaster oven. Toast it in the toaster oven and flip the pork after five minutes. After another five minutes remove the pork and plate it.
3rd - Dashi Stock 

Ingredients:
Konbu Kelp
Dried Silver Anchovies
Soy Sauce
Sake
Sugar
Chinese Cabbage
Water

Steps:
Boil some water in a pot.  Take a piece of Konbu kelp and break it into half.  Put them into the boiling water and soak it for twenty minutes. add the Dried Silver Anchovies to the stock. 
Mix in the Sake, Sugar and Chinese Cabbage to the stock and boil it. When it is boiled drain the dashi stock and remove the ingredients, Keep the Chinese Cabbage. Add the Dashi stock to the Pork stock from earlier.

Bringing the 3 together. Arrange your separate ingredients and prepare the bowls that you are going to put it in. Add the noodles first into the bowls.
Add the mixed Dashi and Pork stock to the ramen bowls. When the bowls are appropriately filled, add all the ingredients into the bowl in a circle type fashion (as in around the noodles in a circle). Add the Konegi on top of the other ingredients. Make sure to serve the Ramen hot.
There you go Kurobata Ramen that is about restaurant standard and for good reason. Enjoy.


Tuesday 14 February 2012

Valentine food(?) Gyu Niku with Garlic Fried Rice

This is for all the men who wanna make some simple meat with a good carbohydrate base.

Gyu Niku (topping of Gyuudon)
Ingredients:
200g sliced beef
Kikkoman Soy sauce
Shabu Shabu stalk
Gyu Niku sauce
Sake
Black pepper
Sliced Garlic
Sliced Ginger strips
Sesame oil
Black pepper

Steps: Mix the sliced garlic together with the sliced beef. Add one teaspoon of soy sauce, some gyu niku sauce and the Shabu Shabu stalk with about one bottle cap of sake, also add some black pepper. Mix the ingredients together well, preferably with a chopstick. 


Heat some oil in the frying pan and fry the ginger until there is a fragrant smell coming from it. This is to take away the combined smell of all your sauces in the meat. Put the meat on the the frying pan, making sure that every part of the meat is cooked. Also make sure that the meat does not overcook because, overcooked beef does not taste good.


Plate the meat and garnish it with some white sesame seeds. This smells really good.


Garlic Fried Riced
Ingredients:
Rice
2 Eggs
2 Stalks Parsley finely chopped
Chopped Seaweed
Magic Sarap seasoning
Soy sauce
Butter
3 cloves of Garlic chopped
Steps:
First put the rice into a bowl and crack and mix in one raw egg into it. Add some of the Magic Sarap seasoning or salt and mix the rice thoroughly. Also add the finely chopped parsley into the rice for some freshness. cover the rice with a plastic wrap and keep in the fridge until it has to be used.


 Put some Butter in the frying pan and fry the garlic. This time really make sure that you cook it for a long time, make sure that the garlic turns brown and you can really smell the garlic flavor. Add the rice onto the burnt garlic and make sure that they mix together well.

Taste the flavor of the rice and add soy sauce accordingly. Push the rice to one side and crack an egg into the frying pan. As the egg is beginning to cook mix it, when the egg becomes completely solid mix it in together with the rice. Plate it and add some chopped seaweed on top.


Fundamentally this is the same rice as the other one, with slightly changed ingredients and method (mixing a raw egg into rice is a method I use a lot). But this one really does compliment the taste of the Gyu Niku. 


Gyu Niku and Garlic Fried Rice.